We celebrated by buying each other "His" & "Her" iPhones, going out to a nice dinner, and beginning summer school (haha)! Joe also bought me a beautiful Swarovski bracelet that I'd been eyeing. We also started an anniversary journal- we basically just wrote down the highlights of our first year and things we are looking forward to in year 2. It was a perfect day. Oh yeah...we also ate a piece of our wedding cake and it was DELICIOUS!

Don't you love our classy plastic dishes?
But now for the real reason for this blog...We've recently become addicted to the Flea Market and we keep finding lots of great pieces that we can restore to our exact liking...it's a really fun hobby and it's saved us a lot of money we would have probably been spending at IKEA.
Joe is (was) in desperate need of dressers. He has so many clothes and not enough space...so that has become our first order of business while we're at the Flea Market or tag sales. On our first trip out about a month ago we found a great dresser...but it was that boring (ugly) brown with horrible hardware...so we decided to paint it and change the hardware. Unfortunately I didn't take a before picture,
but here's the after:

I'm in love with the colors!
So this still wasn't enough space so this week we started looking for another dresser...I went to Craigslist and found this....

We paid $25.00 for this guy...it's in great shape and we already had the paint from the last project.
After Joe's TLC here is what it looks like now...

And the coordinating pair:
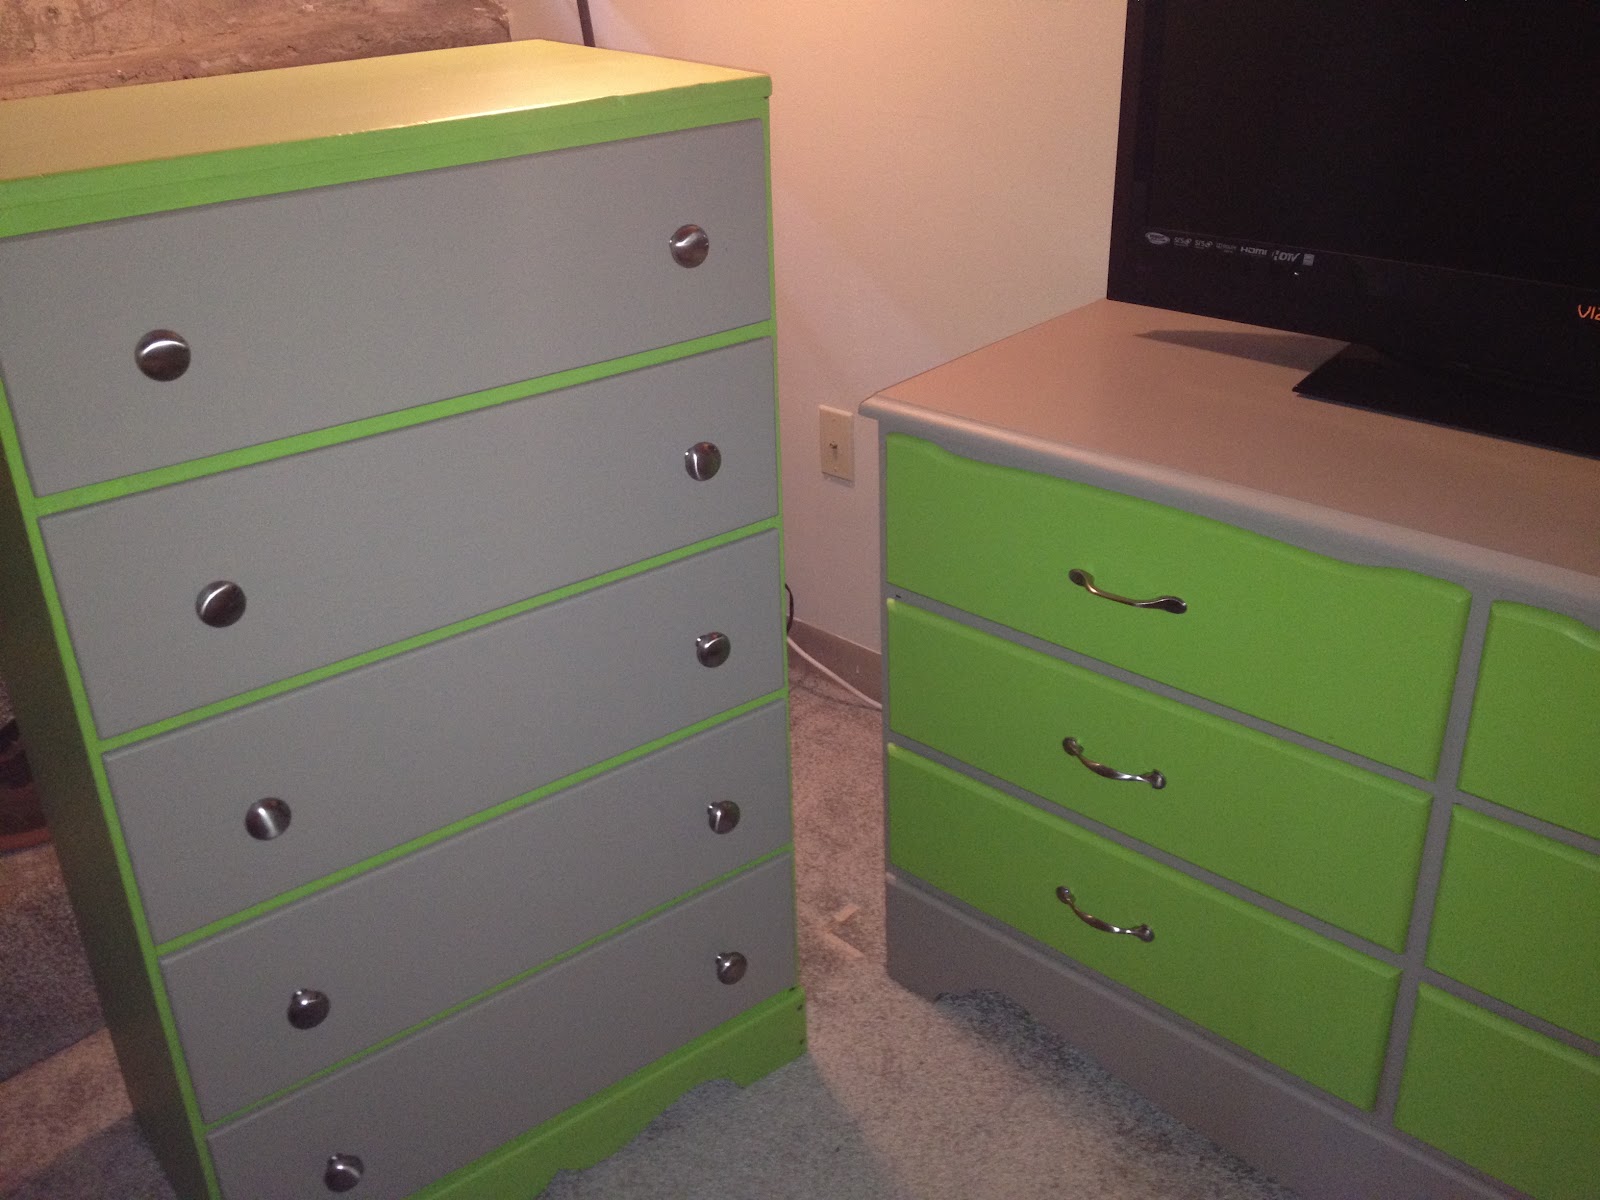
I really shouldn't take any credit for this project other than picking out the colors because Joe did all of the painting and sanding. I really think they turned out amazing and it was such a fun way to get exactly what we wanted.
Now my projects weren't that intense, but fun nonetheless!
First: We have a problem with forgetting to send out mail because it's not beside the door where we grab our keys. I've been looking everywhere for a mail organizer system I could hang on the wall, but I really just needed an "out" box. So I was inspired at a tag sale when I found this basket:

I knew that it was the perfect shape, but of course that Christmas "decoration" had to go. It was just hot glued on so I easily pulled it off. Then I took off the handle and painted the basket the only color I had on hand. (Left over from my mom's party)

I added a ribbon and a piece of scrapbook paper.

I had the ribbon left over from our wedding and the paper and letter stickers in my scrapbook supplies. This basket was part of an "All you can carry for $5.00" tag sale and we carried out about 10 things...
so it was basically 0.50 cents!
The next project I finished this weekend was inspired by my excess supply of burlap. Again, after my mom's party I have a TON of it and I have been searching Pinterest for ideas. I found this idea on Etsy and then I remembered I had a bunch of red buttons from the party as well that I never used. I created this with a frame I found at another tag sale for .50 cents and I didn't even paint it because I really liked the color and I thought it would go well with the burlap and red.
(I know it looks black in the picture but it's really a faded navy blue)

I'm really loving it and the red actually will go well with the photo gallery wall we have in our stairway because we have a couple of red frames. It was super easy to make and it makes me smile.
First I wrapped the piece of matting that came with the frame with the burlap. Then I laid out all of my buttons BEFORE I started gluing. I read a bunch of blogs of people who had completed this project and they warned against gluing, but I have no sewing skills and I thought that the glue would be fine since I was using burlap. I think I was right because it turned out really great. I was worried for a few minutes that the glue wouldn't dry clear, but it did and you can't even tell. I used felt glue because it was the only glue I had other than the hot glue gun. It worked great and was easy to work with without getting everywhere.

So needless to say it was a very productive weekend! I have a few more projects on the docket for this week or next weekend. I bought the supplies to make a couple of wreaths, an infinity scarf (no supplies needed...just a couple of Joe's old T-shirts), and we bought this:

We are probably going to refinish it in someway and use it in the living room as storage/mini desk. I'll post pics as soon as we're finished. The best part is that it was $10.00 at a church sale!!
I also have a couple of cheap round end tables I bought at BB&B a few years go. I plan on painting one in the chevron pattern and modge-podging the top of the other. I'll keep ya' posted!